Negatives
Current State
Running concurrently to the Prints work, was a negative scanning process. Negative scanning is in an interesting moment, where camera sensors and lenses are now good enough to resolve detail at or better than traditional film or flatbed scanners. Depending, of course, on how much detail you really care about. And I care about ALL the detail.
DIY
After much research and debating the merits of DIY vs buying off the shelf, I landed firmly in the DIY camp. This, however, meant building out solutions for the film holder, light source, and frame.
Frame
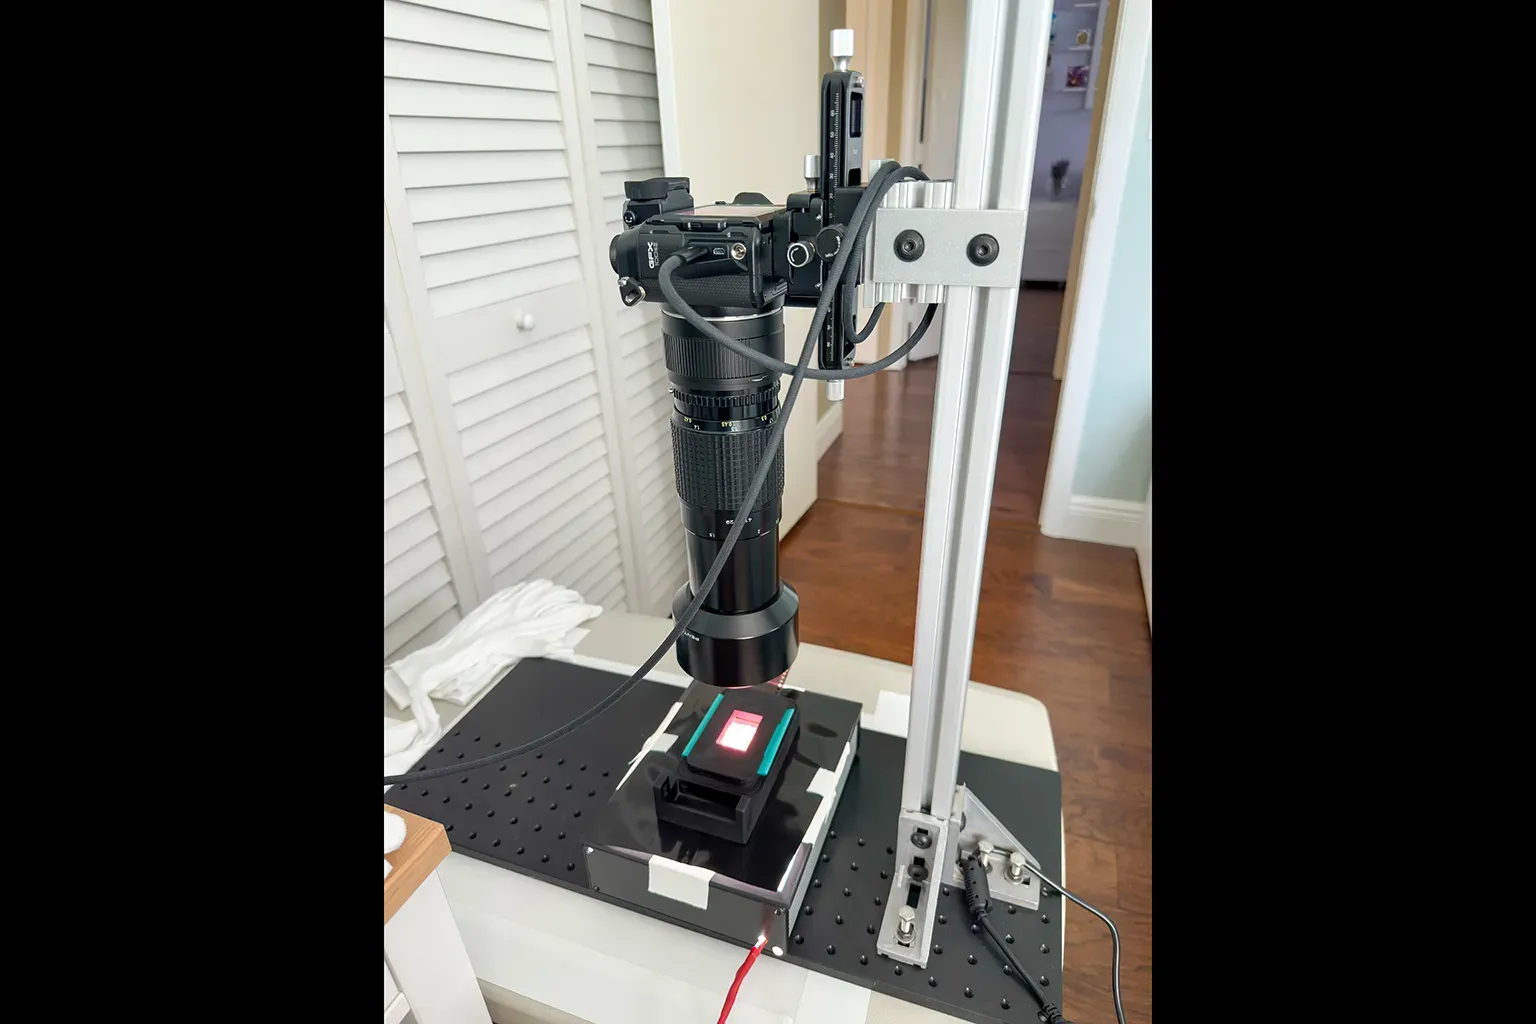
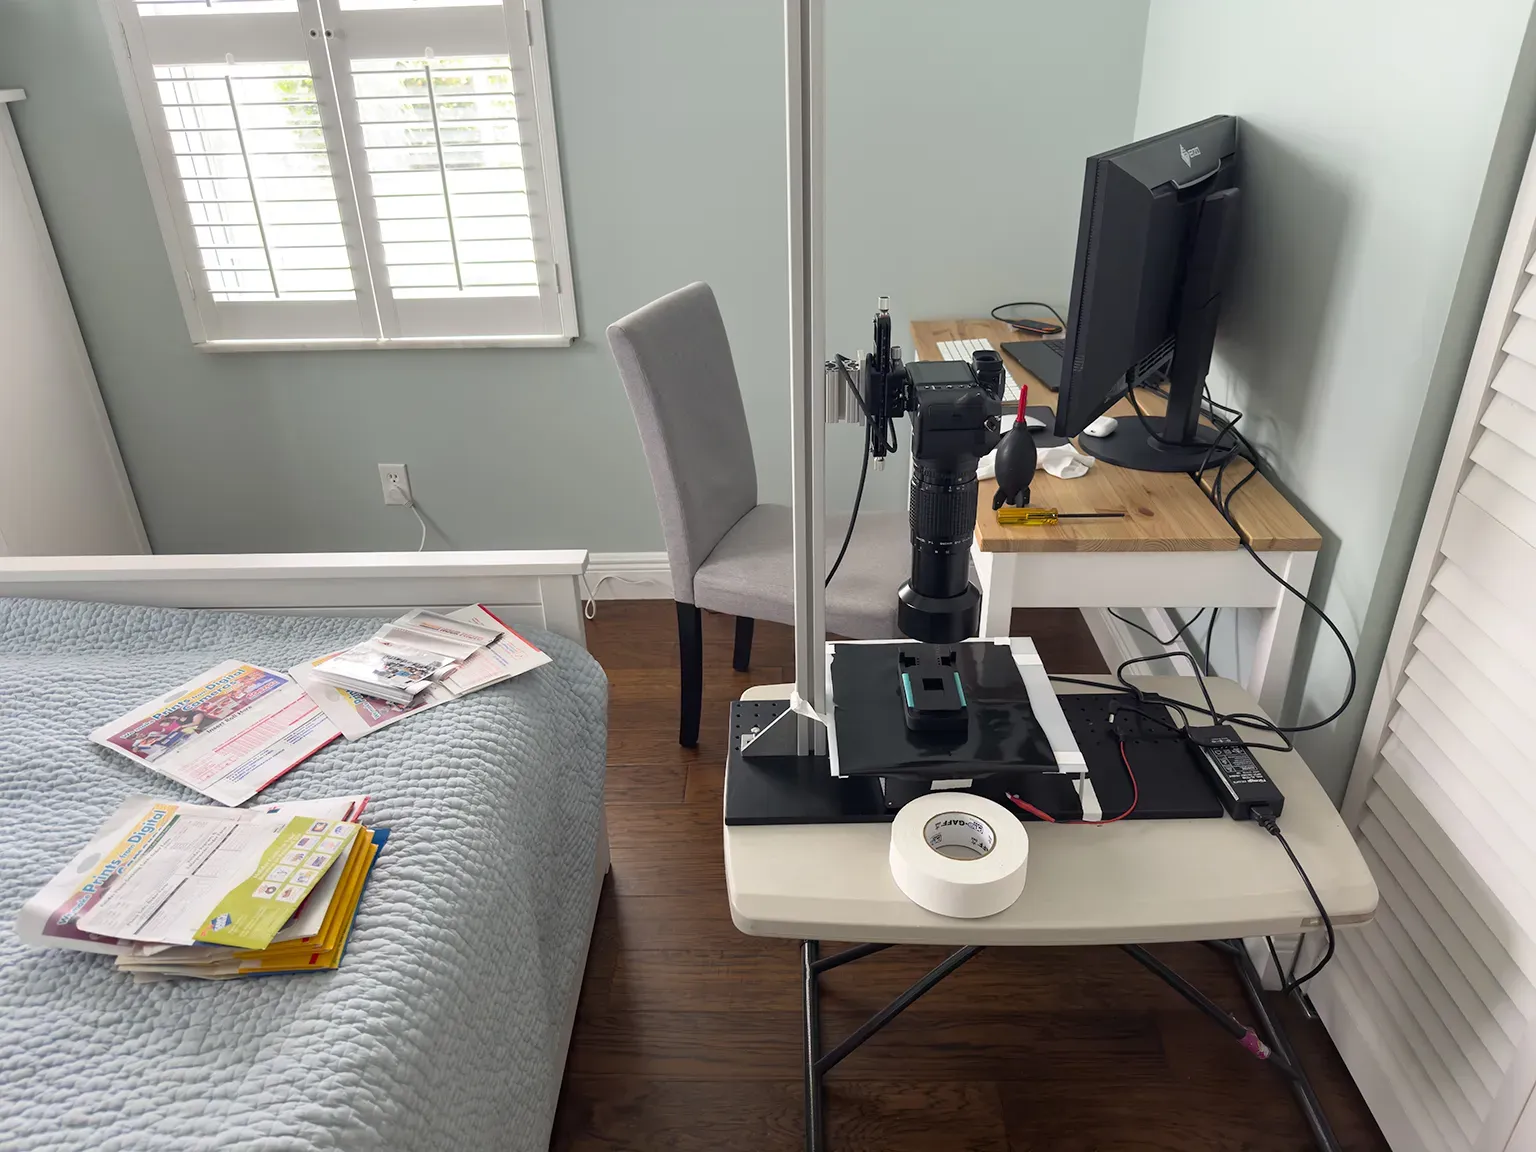
The frame was the most straightforward. Purchase 3-foot 80/20 section from a local robotics company. Use standard parts to marry the pole to a large aluminum plate. Affix the camera with standard 80/20 parts to the pole to allow it to slide up and down. Setup can photograph Minox negatives all the way up to 4x5 negatives with ease. A slider was setup between the frame and the camera for more granular movements in height. Easy!
Light
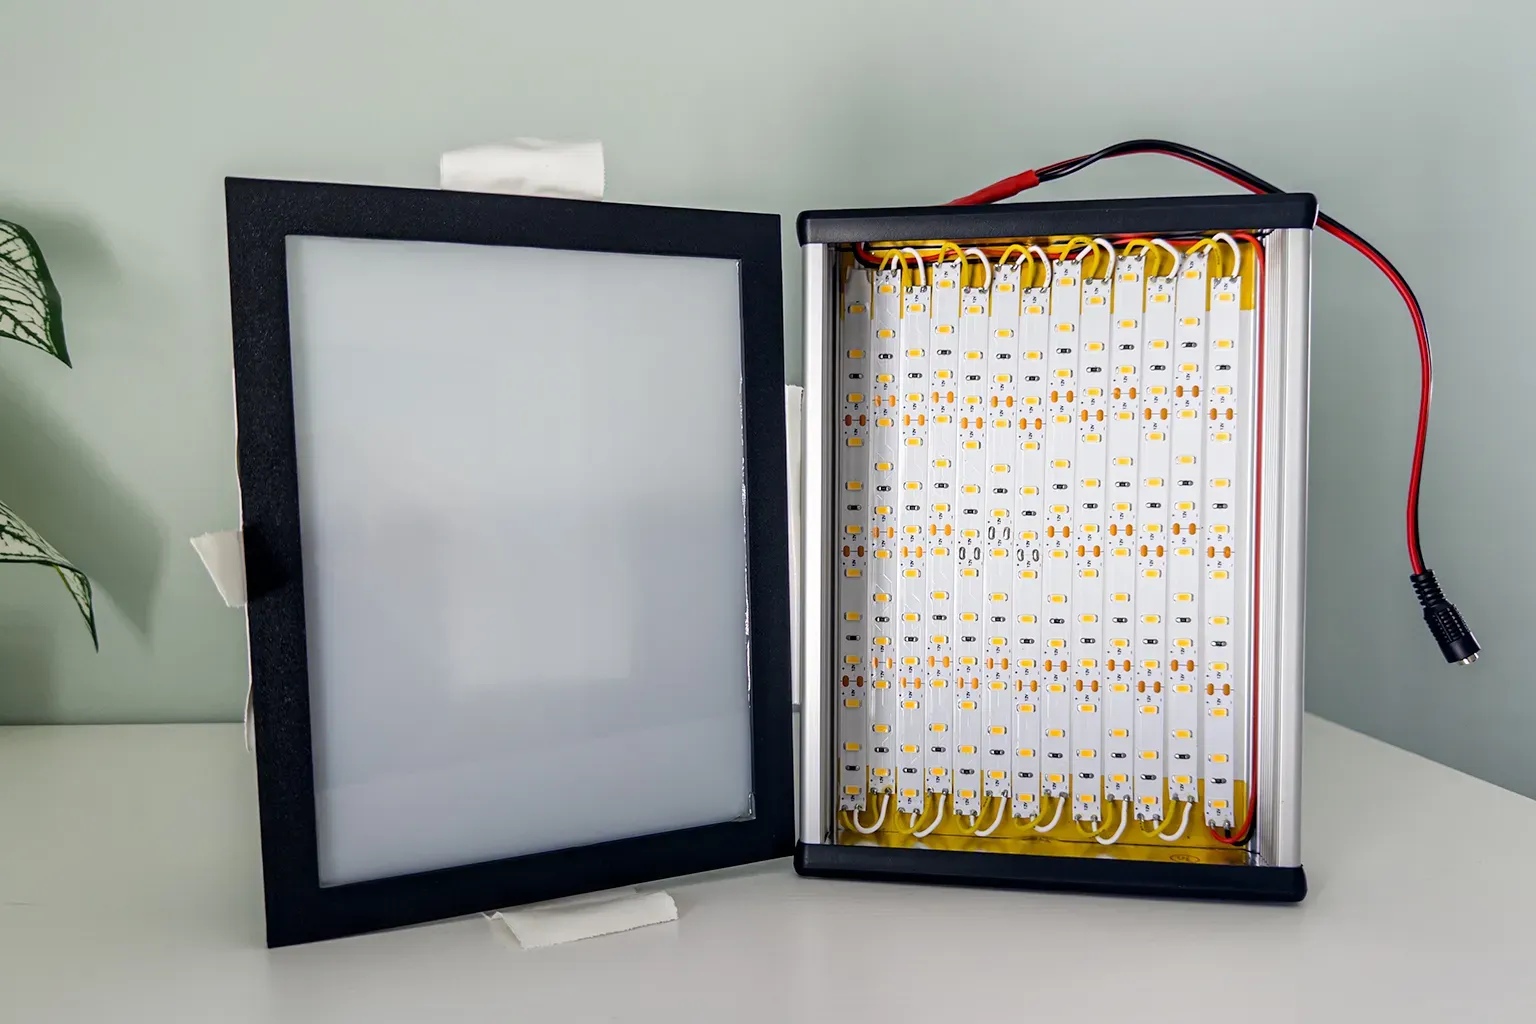
Here is where I got a tremendous lift from a family member. If I was going to get the amount of light I wanted, and the quality of light I wanted, I needed a serious amount of LEDs.
I found a supplier on Alibaba who could provide me with the high quality LEDs I wanted, and a family member graciously offered their time in electronics to help with the layout and soldering. Looks nice, right!? In addition to beautiful bright light, it also serves as a small stovetop to cook eggs on. So…
Box
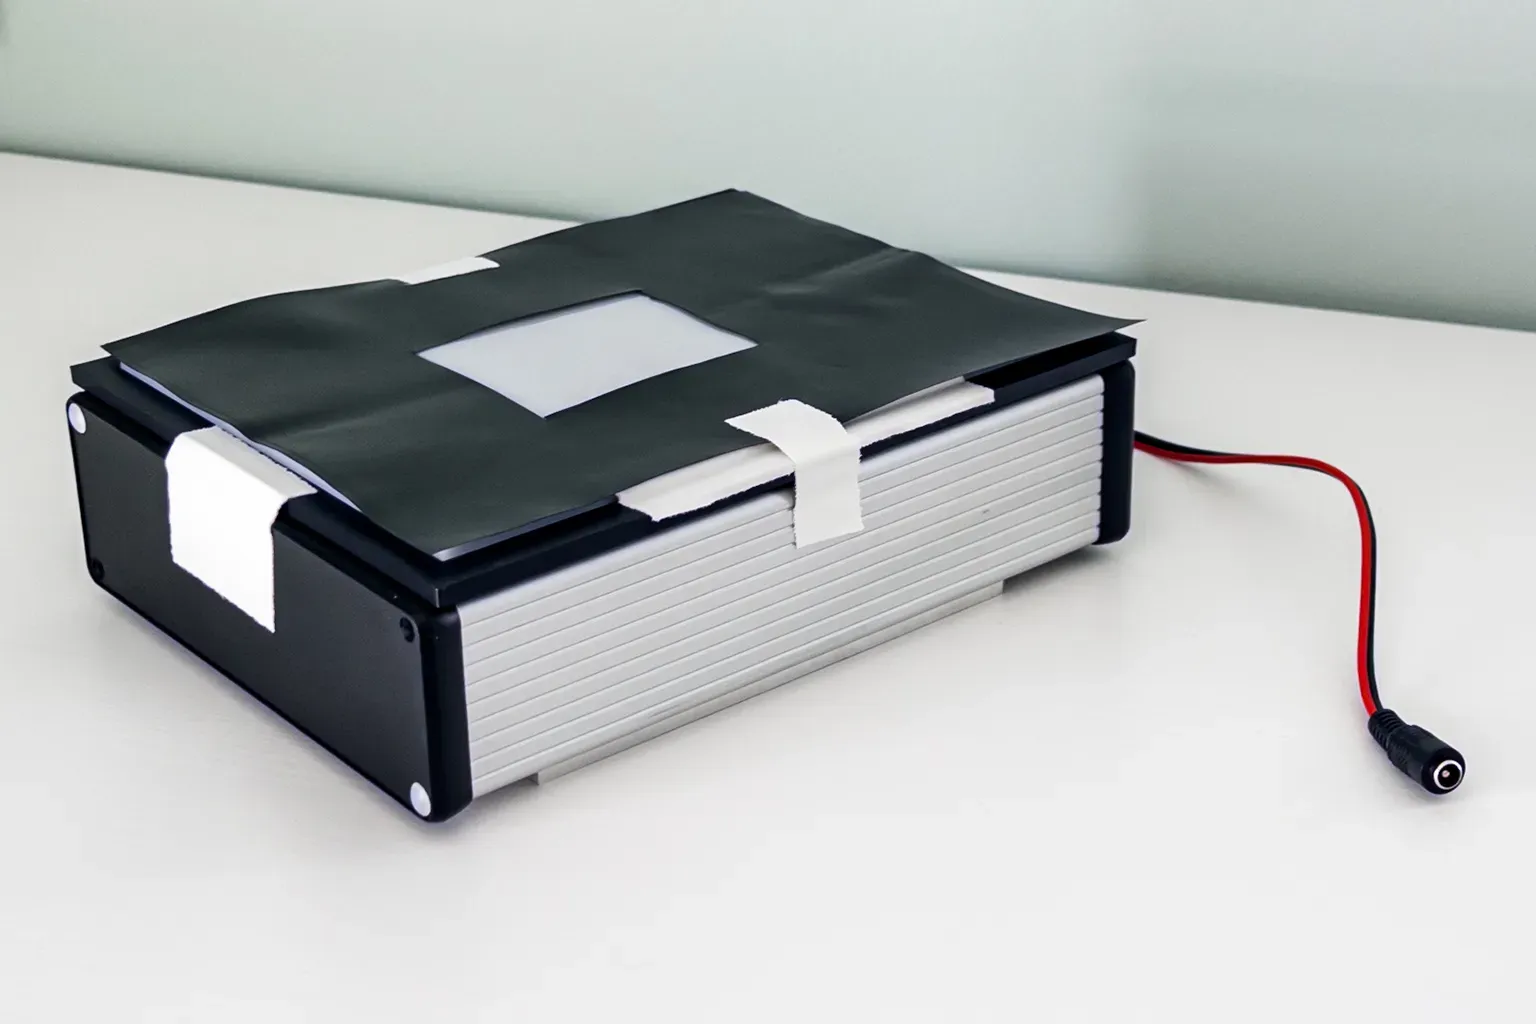
The box is a sandwich. Each part was added with the intention to help move heat or disperse light from the LEDs. The bottom is an attempt to pull heat from the LEDs through the aluminum box, then through a large aluminum plate married to the aluminum body, then to the larger aluminum plate of the main frame. There is an air gap in the middle where I almost added a fan but feared any air movement for negative stillness. Above the air box is a 3D printed frame holding a piece of acid etched museum optical glass. It originally was part of a glass-to-glass holder for 4x5 negatives, but just laying the negative flat on top ended up being fine. Above the glass is an optically neutral piece of white acrylic designed to diffuse light (like the kind used in computer monitor panels). Above that is a light-blocking mask. And above that usually sat the film holder.
Holders
I needed a negative holder that could account for a lot of different kinds of sizes, while ensuring the negatives were flat and not scratched. If I were to do this again, I might end up buying the commercial parts, but at the time, I was all in DIY. A week or so after ordering, the 3D prints arrived in the mail. They looked great, but using them was not super smooth. Not knowing exactly the tolerances I needed for film flatness across different negative film ages and sizes gave a margin for error that was less than ideal. It worked for the project, and good lessons were learned.
Conversion
There was no software that I found that converted the negative image to a positive correctly for every film type in the archive. I tested or built fifteen of the best 2025 options, from complete off the shelf solutions to scripted open-source tools. They all had different strengths and weaknesses for each film type. I ended up with a rough if/else tree. If this type of negative film go this way, else that way.
Wrap
The Prints page has a better explanation as to how this project ended, so please head there and scroll to the bottom if you want to learn that information.
Or just enjoy the final negative from the project. Totally dust free. Probably.